If you have found yourself drawn to any of the apartments in "Only Murders in the Building", it probably says something about your personality. Check out what the design styles of Charles-Haden Savage, Oliver Putnam, or Mabel Mora says about you!
DIY FRIDAY: No-Sew Fabric Shades
This DIY FRIDAY post was suggested by a friend and follower. I’ve heard of this being done and that they really look great. This may be one I try… I love trips to the F&M Fabric Store for their wonderful selection of very inexpensive decorator fabrics and this may be just what I need in my kitchen over my sink to combat the 5:30 p.m. sun that blinds my guests.
Thanks, Shannon!
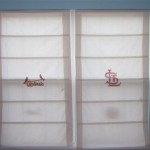
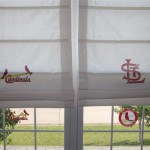
Hey Gina! I just saw your post about featuring DIY ideas…I just did this one and thought you might want to use it.You use regular old mini blinds and if you spend a little $ on the fabric, you can have really nice and customized roman shades. I did this in my son’s room and took it one step further, I ordered 2 Cardinals iron-ons from eBay and so his double window has two roman shades with a Cardinals logo in the middle of each one. I got the idea from a postcard picture I saw of Cardinals roman shades that actually came in the mail, but they would have been over $400 to order. I think I spent less than $50 on the entire project, but if you have some old mini blinds laying around the house it would be even cheaper. Also the great thing is it’s no sewing, can be done completely with Fabric-tac glue!
Good luck and I’ll be reading your DIY posts!
Shannon
(original post & photos from Jenny Komenda at littlegreennotebook.blogspot.com)
MATERIALS
- Tape measure
- Scissors
- Fabritac (or comparable fabric glue – NOT HOT GLUE!)
- Mini blinds (like the $3 Target mini blinds)
- Fabric (yardage depends on the size of your window)
- Trim (optional)
STEP 1
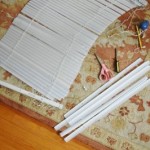 Measure your windows carefully. Then do some math and figure out how many folds you want in your shade. I like the look of a fold every 9 inches, which meant I only needed 6 slats for my small windows.
STEP 2
Let out the blinds all the way, making them the longest they can be. Carefully cut away all of the thin tilting/ladder-like strings, being very careful not to cut the thicker lift cord. I simply ran my scissors along the top of the slats, cutting away the tilt strings and avoiding the lift string altogether.
STEP 3
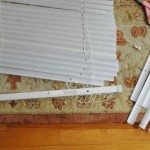 Take out the plastic plugs from the bottom of the miniblinds and remove and put aside the thick bottom slat piece (you’ll need this later). Then simply pull off most of the slats, while leaving the few you’ll need for the folds of the shade. Like I mentioned before, I only needed six slats for my shade.
STEP 4
Make sure the blinds are still let out all the way. Measure carefully and reinstall the thick bottom slat so that the length of your window and the full length of the shade are roughly the same. I decided to make my shade about 1″ longer than my window measurement. Just to make sure it would be long enough.
Trim the extra cord away off the bottom.
Now cut out your fabric, using the shade skeleton as your pattern and leaving a 2.5 inch (or so) border on all sides.
STEP 5
Congrats! You’re done with the hard part! You should have something that looks like this:
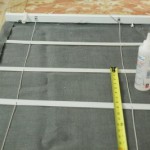 It’s time to start gluing.
STEP 6
Start with the top of the shade. Fold over and glue the fabric together to make a clean edge and glue that to the front of the big top rail mount. **NOTE: Do not glue the folded hem to the very ends of the rail mount. You need to be able to slip the rail into the wall-mounted brackets, so the fabric needs to stay unglued on the very ends.
STEP 7
Measure 9″ (or your preferred fold length) from the top of the rail. Adjust and glue a slat into place. Continue all the way down, gluing the slats to the fabric. I glued the rounded, convex side of the slat to the fabric so there was more slat-to-fabric contact. Make sure not to glue the lift cord to the slats or the fabric.
STEP 8
Glue, turn in and glue again the three other sides of the shade to finish off all the edges. Let it all dry.
STEP 9 (Optional)
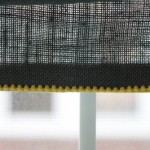 Glue on some trim to the bottom slat. I picked up some super, super tiny ball trim at JoAnn’s for less than $1 a yard. (only needed one yard)
STEP 10
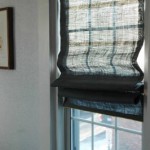 Hang up the shades just like hanging up mini blinds. The cord still functions the same way and, as long as you didn’t glue the lift cord to your slats or fabric, the shade should lift and fold beautifully.

